Automate your deployment flow using AWS Services
Swapnil Sharma / April 03, 2022
9 min read
To implement the CICD Pipeline we’ll be using CodePipeline, CodeBuild and Elastic Beanstalk.
We’re going to deploy a simple node API(Source code) for this example.
Our Application
Node.js
Alright, now it’s time to step into the code zone 💻. We won’t be developing anything fancy seeing as that’s not the main objective of this post.
Project Structure and Dependencies
In the directory of our simple-node-app, let’s create a basic Express API application with a single route that we’ll write tests for. Kick-off the process with the following initialization command:
$ npm init -y
Once our package.json file has been created, we shall install a couple of dependencies.
$ npm i --save express cors body-parser
$ npm i -D chai mocha supertest
You will also need to install mocha globally on your local machine
$ npm i -g mocha
In the application folder/directory, you can go ahead and create a src directory using the mkdir command or your IDE. The folder structure for the application (inside src) is as follows (feel free to put a spin on it):
├── test/index.js
├── app.js
└── index.js
Test Script
Let’s turn our attention to the package.json file generated by the initialization command. We’re going to add a script that when run, will check for files inside the src/test directory and run any tests. As you may have guessed from the installations above, we’ll be making use of Mocha as our test framework, Chai as our assertion library, and SuperTest for HTTP assertions. Add the following script:
"test": "mocha 'src/test/**/*.js'"
Test
Inside the index.js file of the src/test folder, we can add the following content to test the response, status code, response format, and message of the route we’ll create.
const { expect } = require('chai');
const { agent } = require('supertest');
const app = require('../app');
const request = agent;
describe('Some controller', () => {
  it('Get request to /test returns some text', async () => {
    const res = await request(app).get('/test');
    const textResponse = res.body;
    expect(res.status).to.equal(200);
    expect(textResponse.text).to.be.a('string');
    expect(textResponse.text).to.equal('Simple Node App Working!');
  });
});
Express API
Next up, let’s initialize and configure our Express API server and add a /test route to it.
app.js
// Express App Setup
const express = require('express');
const http = require('http');
const bodyParser = require('body-parser');
const cors = require('cors');
// Initialization
const app = express();
app.use(cors());
app.use(bodyParser.json());
// Express route handlers
app.get('/test', (req, res) => {
  res.status(200).send({ text: 'Simple Node App Working!' });
});
module.exports = app;
index.js
const http = require('http');
const app = require('./app');
// Server
const port = process.env.PORT || 3001;
const server = http.createServer(app);
server.listen(port, () => console.log(`Server running on port ${port}`));
That’s about it for our application code 😃, now let’s go ahead and run our test and make sure it passes as expected.
$ npm run test
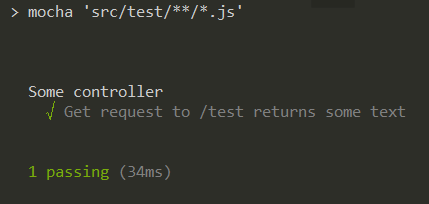
Looks like we’re in business 👍. Let’s create an application environment and setup our pipeline before committing and pushing these local changes.
Our Application Environment
AWS Elastic Beanstalk is a great tool for deploying applications with ease. There’s no cost for using Beanstalk, however, you are charged for the underlying resources that get provisioned.
Switch back to the AWS Console and head over to Elastic Beanstalk. In this section, we’re going to follow these simple steps:
Step 1: Create a New Application
Step 2: Create & Select Environment Tier
Step 3: Configure Environment
Step 1
In the top right corner, you should see a blue label that reads ‘Create New Application’, go ahead and click on it.
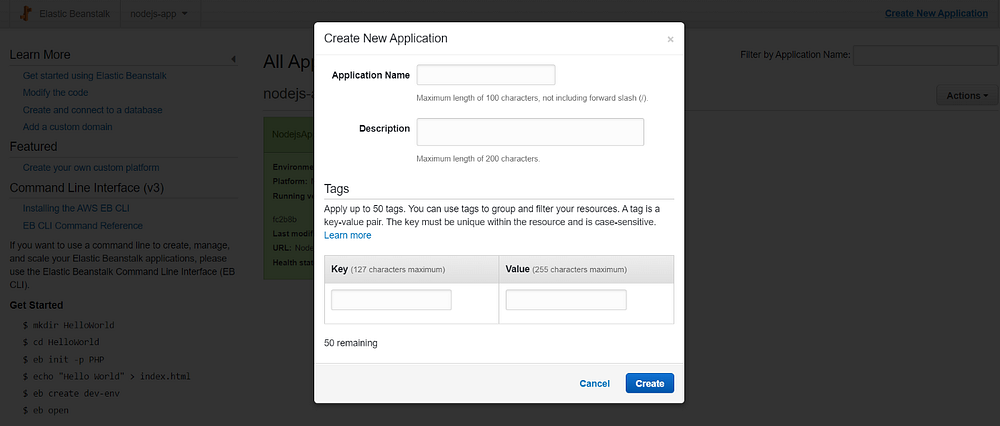
The above form should pop up. You can then name the application whatever you want and don’t have to fill in the description field unless you want to. We won’t be including any tags so don’t worry about that either.
Step 2
Next up, we’ll have to create and select the type of environment that we want Beanstalk to setup for us. Go ahead and create a new environment for your application. Since we’re setting up a standard web API, you can go ahead with the default selection of the Web server environment.
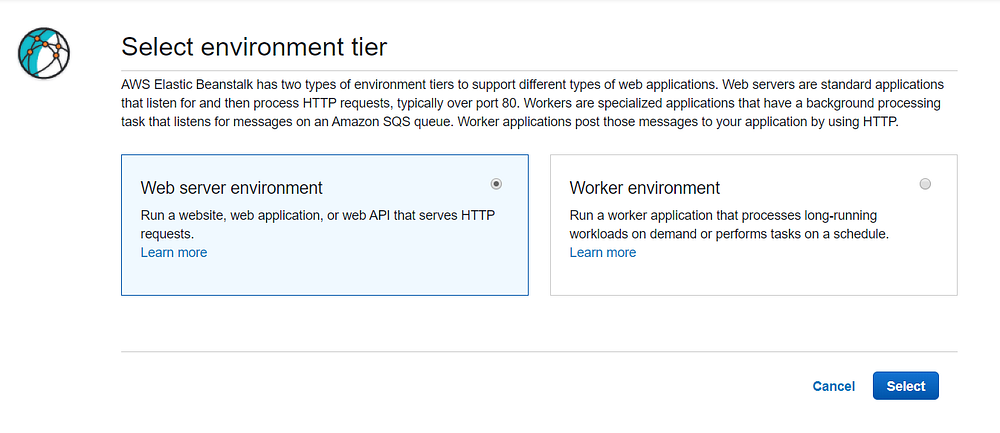
Step 3
In this last step, we don’t really need to change much. You can update the environment name of the application if you wish, but I’ll leave mine as is. An important step here is to select a pre-configured platform under the Base configuration section. You can select the Node.js option because our application is a Node.js based web API.

That’s it for Elastic Beanstalk 😃 , go and ahead and save the environment and Beanstalk will provision and configure the underlying resources based on our selections. Once Beanstalk is done, the environment should be healthy and all setup with a link to a sample application (see image below). In your case, the Running Version should have ‘Sample Application’ as opposed to an application version ID like below.

Our Build Pipeline
Let’s turn our attention to AWS CodePipeline which is a fully managed CD (Continuous Delivery) service that helps automate release pipelines. We’re now going to create a new pipeline. Here are the steps we’re going to follow:
Step 1: Choose Pipeline settings
Step 2: Add source
Step 3: Add build stage
Step 4: Add deploy stage
Step 5: Review and create a pipeline
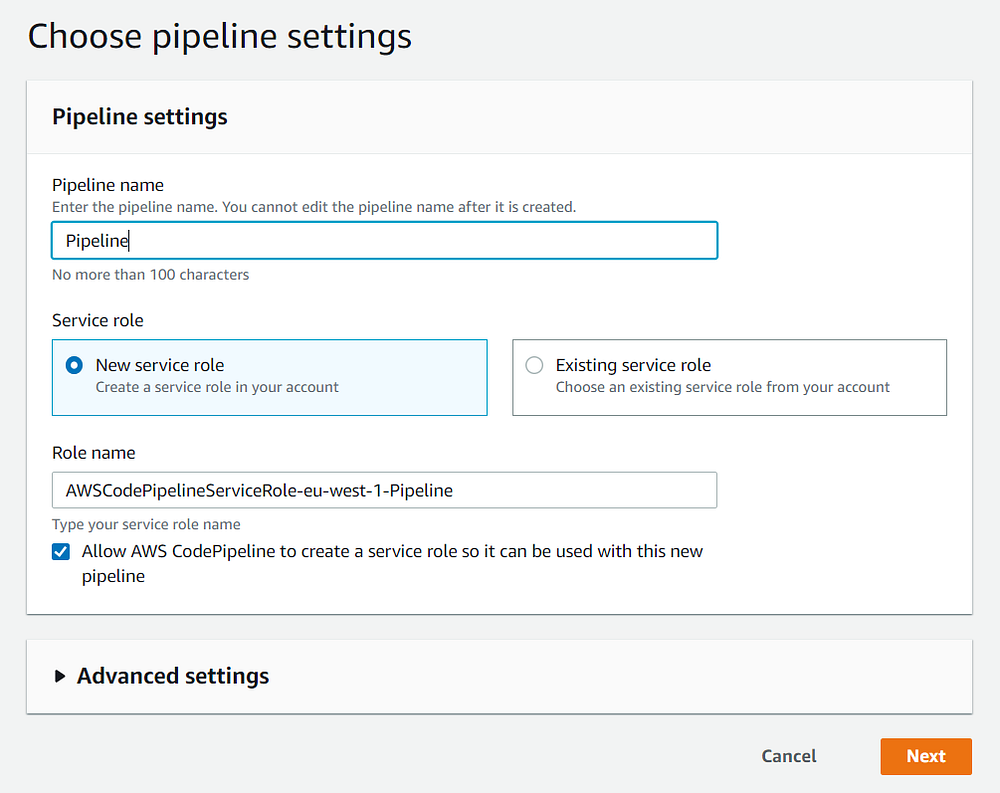
Step 1
Start by giving your pipeline a name and a new service role before proceeding to the next step.
Step 2
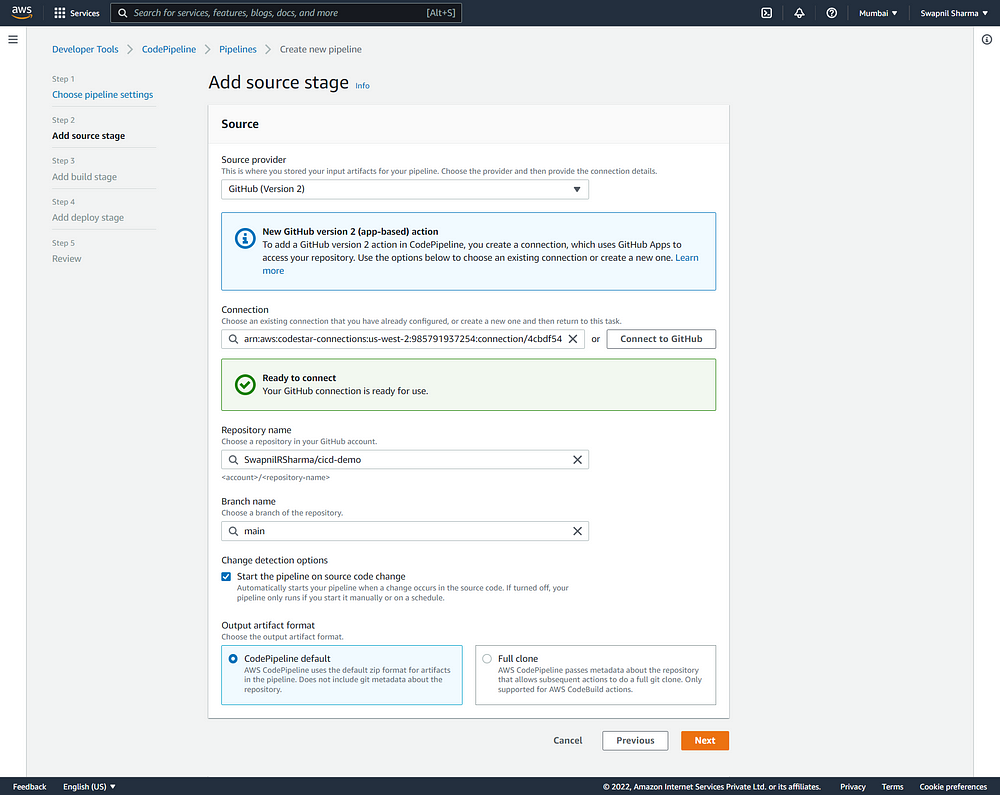
Next, let’s choose the source for our application which is Github(Version 2). Be sure to select the relevant repository and branch.
Step 3
Now we come to the build stage. We are going to be using AWS CodeBuild as our build provider. CodeBuild is a fully managed CI (Continuous Integration) service that will compile our source code, runs the tests in our Node.js app, and produce a software package that is ready to be deployed. We have not created any projects in AWS CodeBuild yet, so we’ll have to create one on the fly by clicking on the Create project button.
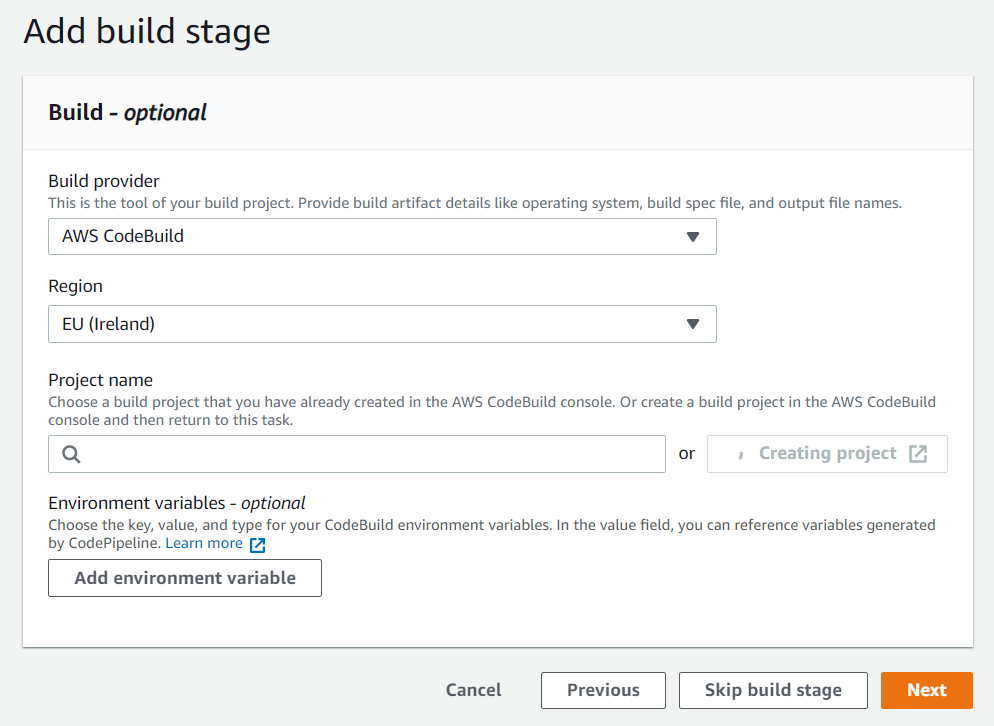
By clicking on this button, a new pop-up window will appear for you to create a Build project in CodeBuild. Go ahead and enter a project name and description (optional entry). For the environment settings, we will maintain the default Managed Image and the selection of a new Service Role.
For the Buildspec section, we’ll be using a builspec.yml file so this can remain unchanged. A build spec is a collection of build commands and related settings, in YAML format, that CodeBuild uses to run a build.
The option for logs to be output to CloudWatch can also remain unchanged.
Step 4
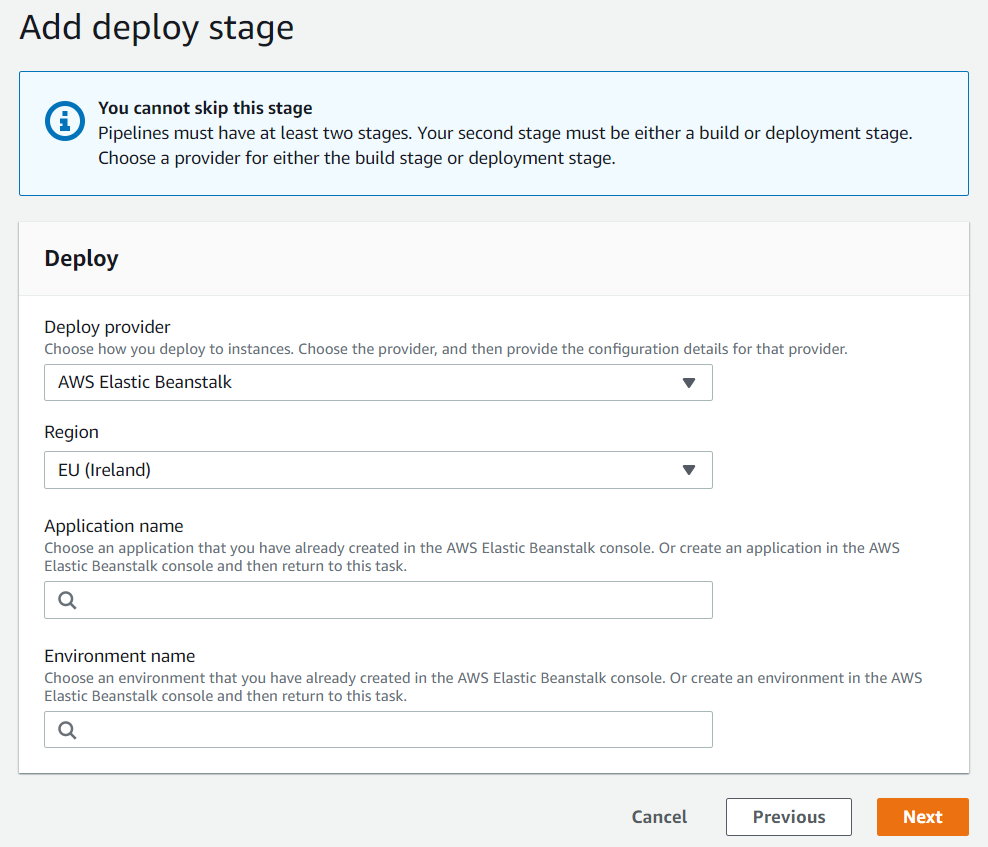
Finally, we come to the last main step — our deploy stage. Just in case you were wondering what the point of the Elastic Beanstalk application was, now is where it will be needed. We’re going to be using Elastic Beanstalk as our deploy provider. Remember to select the relevant application and environment.
Step 5
Once we’re done with that, all that’s left is to review the pipeline and go ahead and create it.
Add Buildspec To Application
At this point, our pipeline should be ready to go. Before we test it, let’s add the buildspec file at the root of our project. I mentioned in Step 3 of the previous section what the importance of this file is. Now let’s go ahead and implement it in our project because AWS CodeBuild will be looking for this file on the build step of our pipeline.
This file will specify the phases which represent the commands CodeBuild runs during each phase of the build. You can read more details on the buildspec file here.
install: install dependencies you may need for your buildpre_build: final commands to execute before buildbuild: actual build commandspost_build: finishing touches
buildspec.yml
# Do not change version. This is the version of aws buildspec, not the version of your buldspec file.
version: 0.2phases:
  install:
    runtime-versions:
      nodejs: 10
    commands:
      - echo Installing Mocha...
      - npm install -g mocha
  pre_build:
    commands:
      - echo Installing source NPM dependencies...
      - npm install
  build:
    commands:
      - echo Build started on `date`
      - echo Compiling the Node.js code
      - npm run test
  post_build:
    commands:
      - echo Build completed on `date`
# Include only the files required for your application to run.
artifacts:
  files:
    - src/index.js
    - src/app.js
    - package.json
    - node_modules/**/*
Trigger New Build
After adding the build specification to the root of your code, you can go ahead and commit all your changes and push them to the master branch. This will trigger a new build and deployment in the pipeline we just created.
Our pipeline will pull from the source (CodeCommit) in this case, and then build our application and run the tests we created (which can be viewed from the build logs). If these passes, Elastic Beanstalk will then proceed to deploy our application.
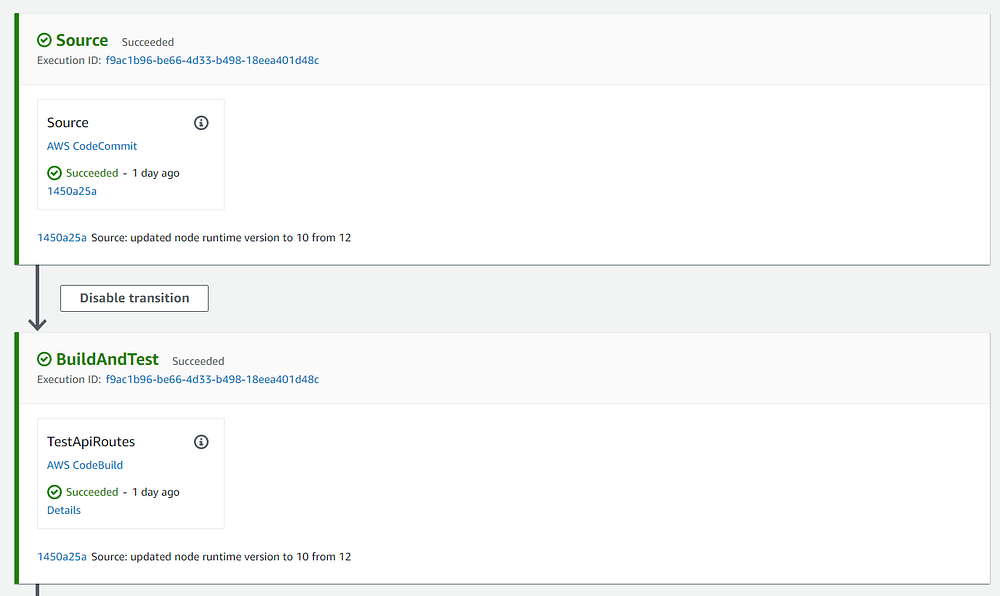
Successful build and test

Testing Our Deployed Web API
Now, the moment you’ve been waiting for. Provided that the deployment was successful, we can take the displayed URL from the Overview page of our application environment in Elastic Beanstalk (ends with [region].elasticbeanstalk.com). You can then run a GET request to this URL with the /test route that we added and you should get the following response:

You can find the source code for this basic project here 😃, happy coding!
Subscribe to my newsletter to get early access to all my content.
Subscribe to the newsletter
Get emails from me about web development, tech, and early access to new articles.
